

Advance Settings
The Advance Settings step allows user to schedule metric refresh at regular specified intervals.
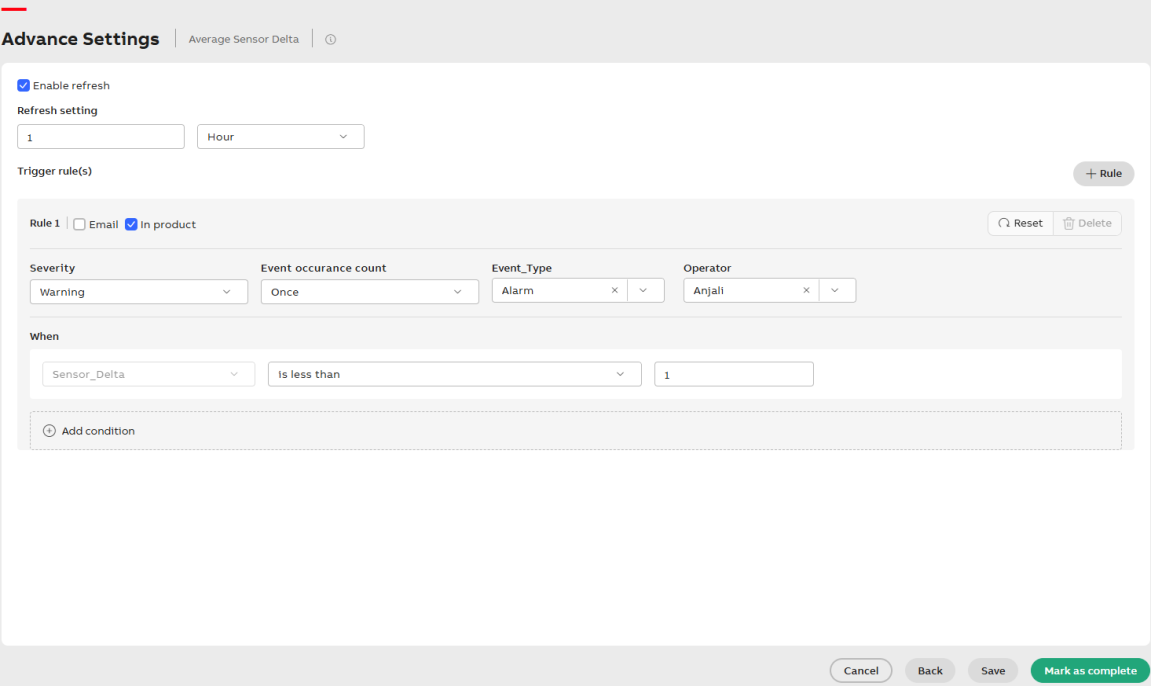
Advance Setting
To configure Advanced Settings for the metric:
-
Enable Refresh
Select Enable refresh checkbox to allow the metric to fetch updated data from KSH at regular intervals.
Once enabled, under Refresh settings, define the refresh frequency in the input field and use the dropdown to select the interval unit—Hour or Day.
-
Configure Trigger Rules
Click +Rule to define alerting conditions. This opens the rule configuration panel.
Within each rule, configure the following:
-
Enable Email Alerts
Select Email checkbox to send notifications via email.
-
Enable In product Alerts
Select In product checkbox to send in-app alerts.
These alerts are visible in the Notifications section at the top-right corner of the page.
-
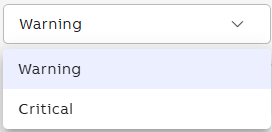
Select Severity
Choose appropriate Severity level from the dropdown to indicate the criticality of the alert.
Type of condition
-
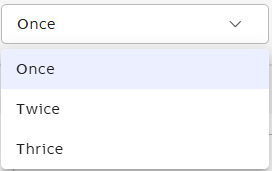
Set Event Occurrence Count
Choose how many times the condition must be met before triggering the alert.
Select Event occurrence count from the dropdown.
Event Occurrence
-
Select Dimension Type
Defines the lens through which the trigger rule operates, such as sector, department, geography, or type.
Select the dimension type from the dropdown based on the metric's configured dimensions.
-
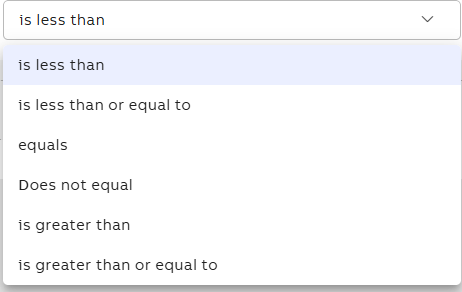
Define Condition
Select the condition type (e.g., equals, greater than, less than) from the dropdown.
Condition
-
Enter Threshold Value
Input the numeric value in the Number field that the system uses to evaluate the condition.
-
Additional Options (Optional)
-
Click +Add condition to include more criteria under the same rule.
-
Click Reset to restore the current settings to their default values.
-
Click Delete to permanently remove the selected configuration or filter set.
-
-
-
Click Save and Finalize
-
Click Save to apply all settings.
-
Click Mark as complete to finish metric creation.
The metric now appears on the Genix Metrics Hub home screen.
-
When comparing numeric values (e.g., Efficiency = 86.46), minor differences may occur due to rounding or precision limits. The system uses a tolerance level to account for this, so values are considered equal if they fall within an acceptable range. This helps ensure reliable notifications and alerts.